
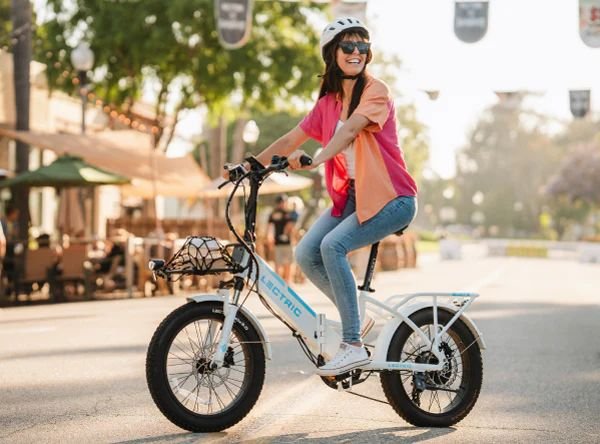
Electric scooters are currently among the most fascinating inventions in personal transportation. They will not only become a trend in 2025, but they will also be a practical way of commuting in our day-to-day life. These greener machines save cost, less pollution and freedom of fuel dependency. Instead, however, of spending money to acquire an expensive commercial model, a lot of people have begun to assemble their own electric scooters.
This saves money as well as letting you know how electric mobility works. The act of producing a scooter by yourself is a fulfilling exercise that combines creativity and sustainability. This is an instructional guide that includes all the information about assembling your own electric scooter with details of design and parts, wiring, safety, and performance tests.
The Basics of an Electric Scooter
The next thing that it is necessary to know before constructing anything is the way an electric scooter works. All the scooters operate with a blend of a mix of elements that joins to generate smooth movement. The motor is used to produce power, the controller is used to regulate the flow of power, the throttle is used to regulate the speed, and the battery holds the electricity necessary to power the motor.
These are all backed by robust frames, good brakes as well as durable wheels. When you press the throttle, the controller takes the power out of the battery and feeds it to the motor making the wheels move and the scooter starts moving. This is a fundamental process that is important to know before you embark on the construction process.
Main Components You’ll Need
- Frame- The framework that binds it all.
- Motor -The motor is the force that propels the wheel.
- Battery- Holds energy to drive the motor.
- Controller- Controls current between battery and motor.

How To Plan and Design Your Scooter
Any great project begins with passable planning. The first step is to control the type of scooter you are going to build. Choose the range and design that would match your needs. Others want to use a small scooter to travel in the city over short routes. Whereas others want a powerful model capable of traveling over long distances. Most of the DIY scooters have a top speed of between twenty and thirty kilometers per hour, which is ideal with daily commuting.
The distance may be twenty-five to forty kilometers with regards to battery size. A 250-to-500-watt motor is a good one to start with and a 24–48-volt battery pack can be a good one. It is also necessary to sketch up a rough design on paper or in simple 3D design software. Indicate the location of the motor, battery and controller. Planning will assist you in avoiding flaws in designing and will see everything fit properly in the future.
Selection of Materials and Tools
You will be required to have a number of materials and tools to assemble your electric scooter. The primary components are a motor, a bracket of batteries, a controller, a frame, a handlebar, brakes, throttle, and wheels. A brushless DC hub motor is the most appropriate type of motor that can be used in this project due to its efficiency and durability. The battery must preferably be lithium-ion pack as it has got more life, charged faster and is lighter in weight.
The controller serves as the brain in the circuit connecting the motor and the battery. They may be made of steel or aluminum: steel is stronger on the other hand, aluminum may make a scooter lighter. Assembling will require such tools as screwdrivers, wrenches, a soldering iron, a multimeter, and a drill. The presence of all the needed tools and materials before the commencement of the process will save time and make the process proceed in a flawless manner.
Building the Frame
Your scooter has its frame as the base; therefore, it has to be strong and well balanced. Either you can use an old kick scooter frame or create one using metal tubing. In case you choose to construct it manually, then high quality steel or aluminum pipes can be used. Assemble the parts by welding or bolting to create a solid base upon which there is a handlebar mount and wheel alignment points.
Be light but strong enough to support your weight. Fitting a wide deck is possible on top of a fixed deck, of metal or wood, to stand. Make sure that there is the right amount of front and back wheels because improper position may result in loss of stability and safety. Once the frame is ready the frame and paint. It without rusting and making it look professional.
Installing the Motor
It is the motor that makes your scooter come alive. The majority of individuals choose to put a hub motor in the back wheel as it occupies less space, and it is direct power. Use heavy bolts in order to clamp the motor and make it perfectly flat against the frame. In case the motor is tight or loose, tighten or loosen until it turns freely. Chain-driven could also perform, however it is more space and maintenance-consuming. The next thing to do after fitting the motor is half-way to having your scooter on the road. The rotation direction must always be checked and then wired to the controller.
Electrical System Wiring
The wire installation is a slow and delicate task since any slight mistake can destroy the electrical components. The controller is the one that connects the battery, motor, throttle and brake sensors. Installation Start by attaching the positive and negative contacts of the battery to the power input on the controller. Next connect three phase wires of the motor phase and small hall sensor connectors.
There are generally three small wires on the throttle and signal fit them correctly as the wiring diagram accompanying your controller. Brake sensors should be installed in such a manner that the motor will cut off as soon as you press the brakes. After all the connections are done, do a check on the voltage and continuity using a multimeter. When all the wires are in place, tie them using zip ties and wrap them in insulating material.
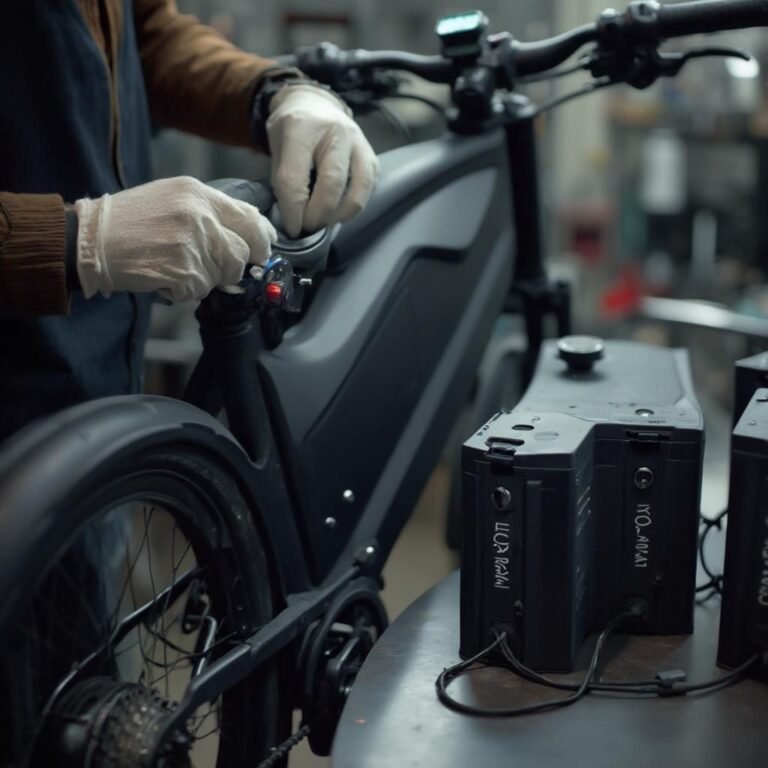
Installing the Battery Pack
The battery pack is the most important and sensitive of all parts of your scooter. It should be made sure that it is an average height and generally lower than the deck or near the center of the frame. Fasten it with bracketing or strapping to avoid vibration when riding. Install the output wires into the controller and place a fuse or a circuit breaker between them. Measure the voltage prior to turning on the system.
Lithium-ion batteries are desired due to the fact that they are faster to charge and generate greater power over extended durations. Always remember to treat the battery with care because improper installation of the battery may result in short circuit or lower performance.
- Attach the hub motor on the rear wheel (most popular).
- Install the motor as tight as possible and in line with the axis of the wheels.
- Bolts and locking nuts are used to fix it.
- Ensure that the motor is free to spin when not powered.
Installation of the Brakes and Throttle
When you have your electrical parts in place you can now install the throttle and brakes. Attach the throttle to the right of the handlebar where it is easy to adjust the speed. Brake levers must be placed on both sides to have balance control. Disc brakes are also the best suggestion as they deliver good stopping power and last long. Install brake cables correctly and so that they slide easily without friction. When you press the lever, the brakes are supposed to send the motor to cut power immediately. Check front brakes and rear brakes several times in order to ensure they are properly working.

Installation of the Wheels and Deck
And now the time has come to put on the wheels. The font wheel should swivel freely with the rear wheel bearing perfect contact with the motor hub. All the bolts and nuts should be tightened to prevent wobbling. Then put the deck on – the platform on which you are going to stand. Wood can be used with a piece of grip tape or a sheet of metal with an irregular surface to give it more traction. Make sure that the deck is fixed and comfortable to your feet. Balanced deck does not only ensure better stability, but also better looks on the scooter.
Testing the System
It is essential to test all parts prior to the first ride. Switch on the power and slowly turn the throttle body to check whether the rear-wheel is rotating easily. Test the brakes to make sure that they stop the wheel immediately. When the motor does not start, re-examine the connections of the wiring and the battery voltage.
There are also cases where improper wiring or loose connection leads to a problem in starting. When taking the test, be mindful of strange sounds or vibration, these may mean that it is not aligned or has some loose components. When everything works out, then you are ready to make your first test ride on the road.
Lastminute Touches and personalization
Once you are sure that your scooter is running well. It is time to make it special. Painting the frame in high colors placing LED lights to see more clearly and a small digital speedometer to check performance is also possible. Safety on city rides can be improved by the use of a horn or a buzzer.
Even shock absorbers can be fitted at the front wheel to help you make smoother rides on the rough roads. These are not only beautification additions but also scooter safety and utility enhancement additions. Personalization of your scooter makes it a personality and unique.
Safety and Maintenance
Safety must be of the first order. Always put on helmet, gloves and knee guards when riding. Do not expose electric parts to water as they may get spoilt. Test tire pressure, brakes and bolts on a regular basis. Wash the scooter after every week to eliminate dust and rust. Do not take charge to the full because this may reduce its life. It should be recharged after each ride and kept in a cool place. A scooter that is in good condition will serve a number of years without any problems with its performance.
Cost and Affordability in 2025
Affordability is one of the greatest advantages of construction of your own scooter that runs on electricity. By 2025, scooters of comparable features will be sold between eight hundred and twelve hundred dollars, and a home-based scooter can be built between three hundred and five hundred dollars.
The motor and the battery are the most expensive, but their performance and durability make them worth the price. Due to the money-saving aspect as well as the full control of customization and upgrades, building your own scooter is not only more cost-effective but also allows you to enjoy the benefits of being in full control of your new scooter.
Solving Notorious Problems
You may experience some trouble on your way that can be resolved easily. In case the motor does not spin and controls links. Should the scooter vibrate or produce a sound check. The alignment of the wheels and the balance of tires. A low battery or damaged cell is normally indicated by weak power output. Soft brakes may be repaired by reduction the cables or by pouring in hydraulic fluid. It is good to know such quick fixes to keep your scooter in good condition without repairing it by a professional.
Legal and Environmental Factors
Ensure that you research the laws in your city before riding your electric scooter in view of people. Certain regions might also possess certain regulations concerning speed limit helmet use. By adhering to these laws. You will remain safe and will not be fined. The making of an electric scooter is a green project as well. It does not emit any harmful discharges which are caused by petrol scooters and helps with making the air cleaner. As the world approaches a sustainable transportation system each bit helps.

Conclusion
Assembling an electric scooter by yourself is not a mere project – it is a self-growth of learning, creativity, and innovation. It shows you how modern transportation is made and provides you with the pleasure of being driven around on something that you have constructed. Building the frame and wiring the motor is one thing and testing performance and creating your own features is another one, and it is not easy to guess the satisfaction level and knowledge gained at each process.
The best thing is that you come up with a completely functional, environmentally friendly vehicle that is economical and does good for the environment. As personal electric transportation is yet to be invented in 2025. It remains an amazing concept to build your own scooter to join the revolution. Thus, prepare your tools and assemble your own electric scooter today. Your invention of technology and independence in one thrilling adventure.


Pingback: Top 10 Mistakes Beginners Make When Building an E-Bike